The email composer lives on the right side of the Sequence Editor. This article is a tour of every control on it - what it does and when to use it.
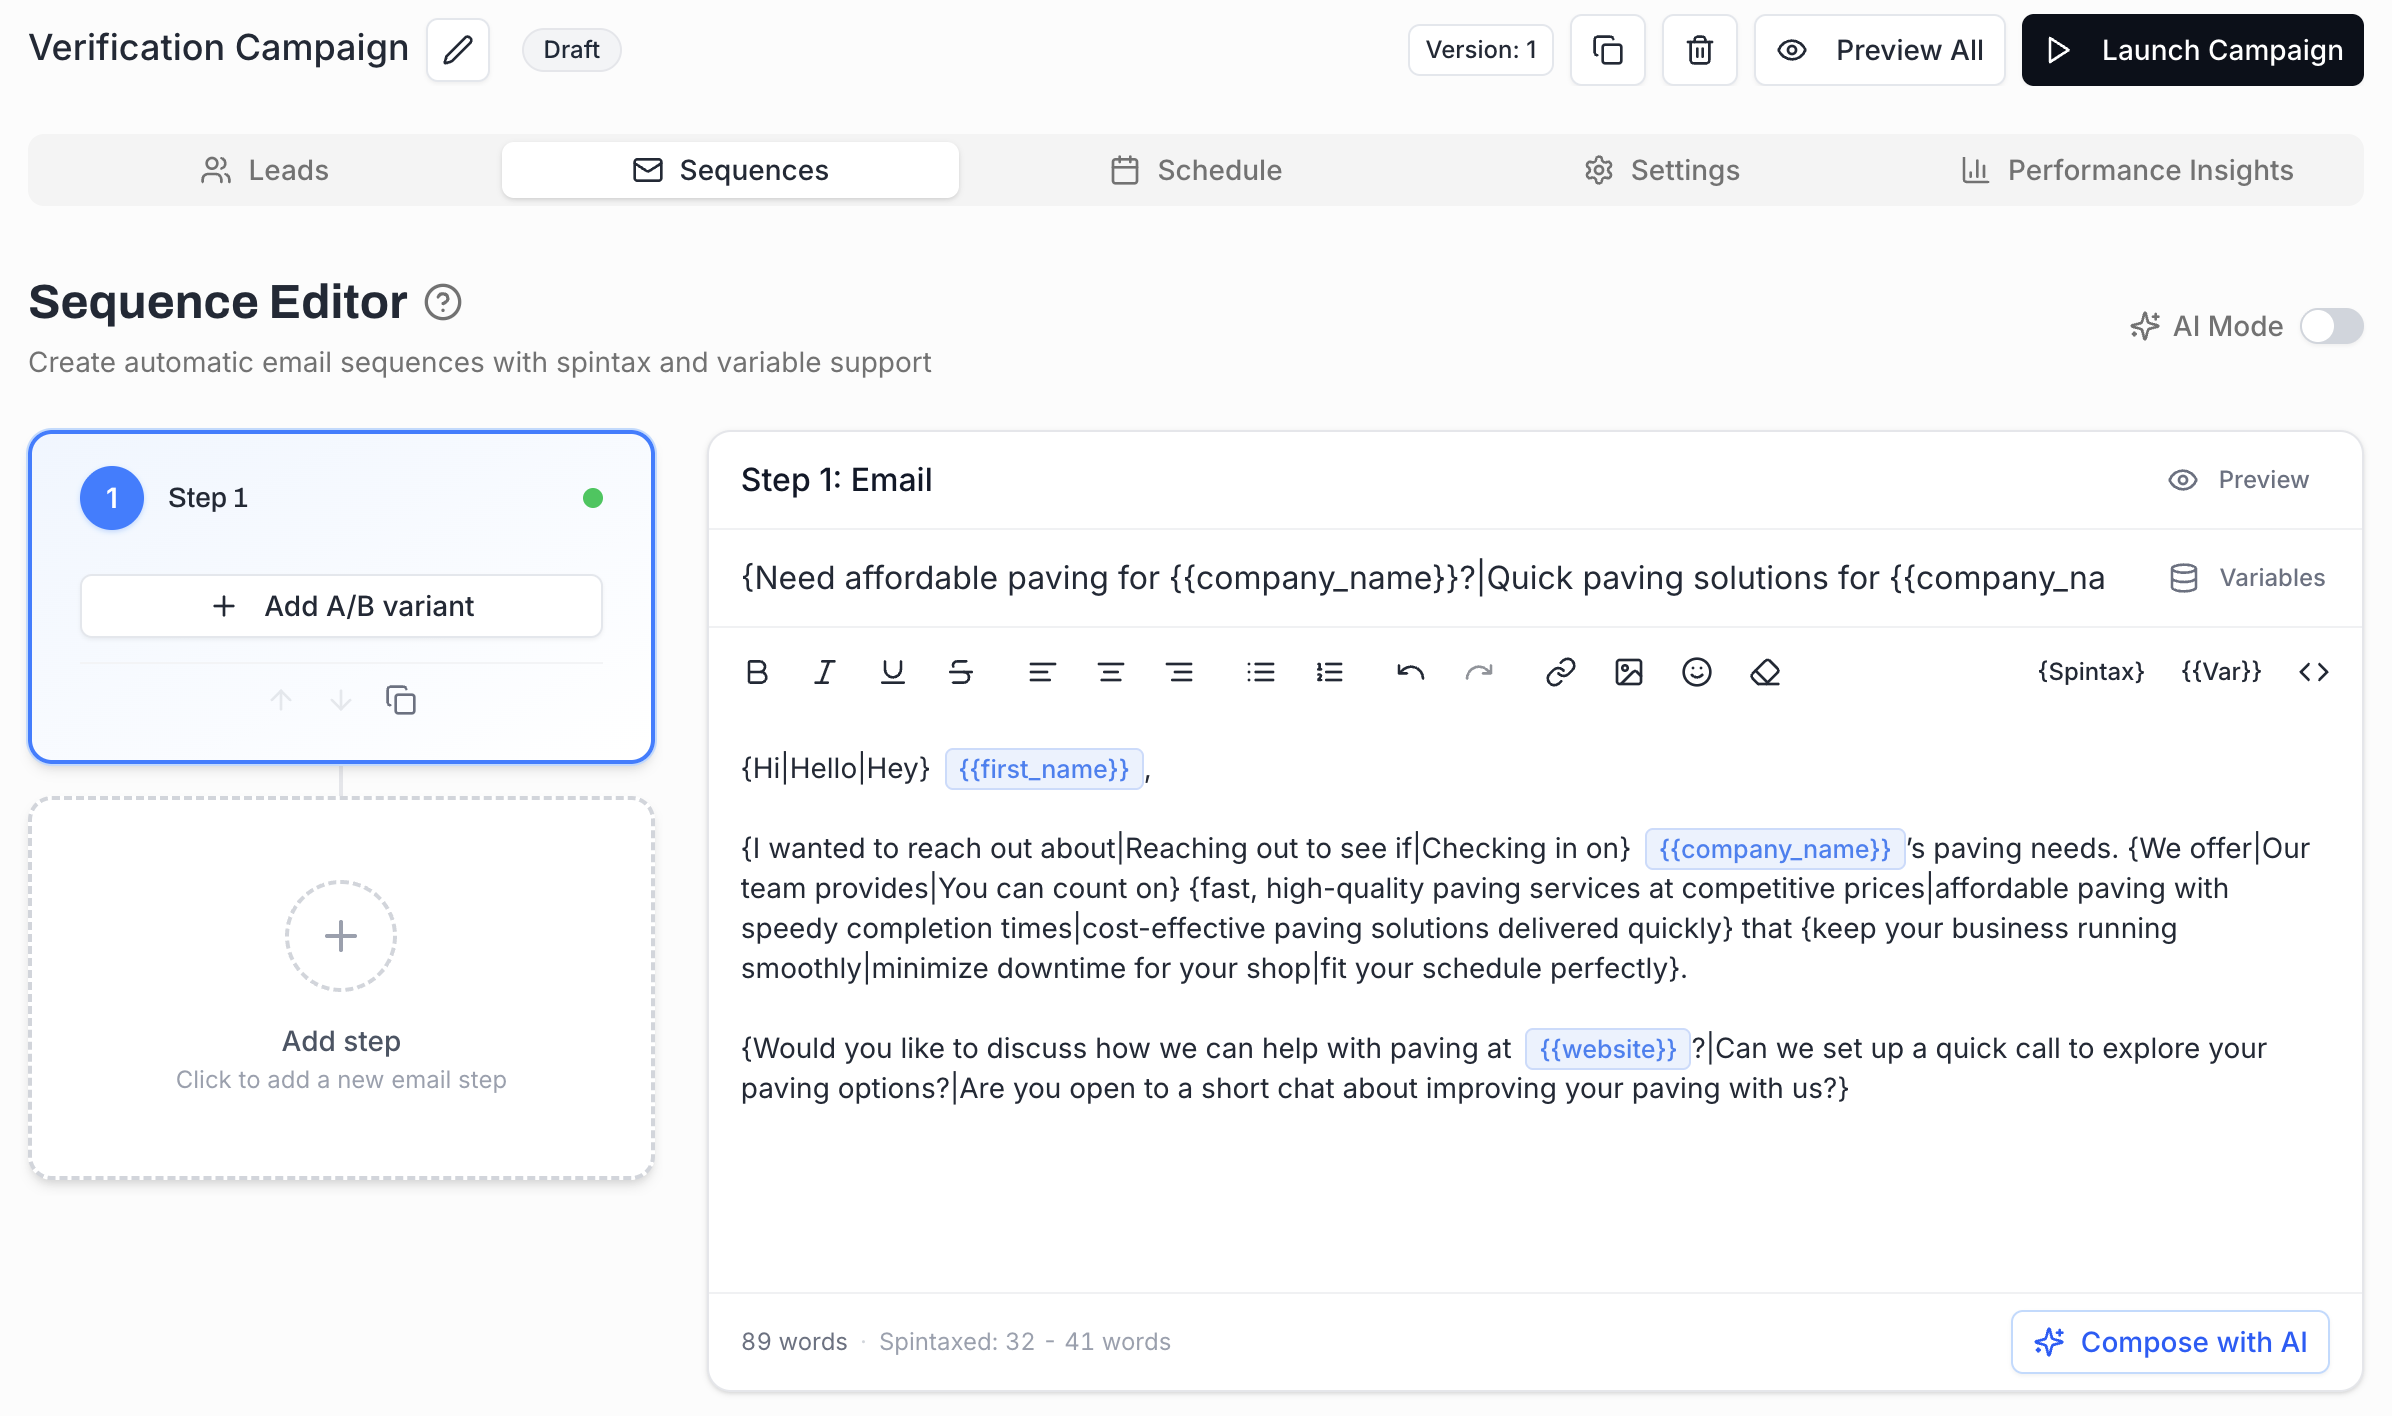
The single-line input above the body. Recipients see it first - it's what makes them open or skip.
Keep it under 60 characters, write it like a colleague would, drop in {{first_name}} or {{company_name}} for personalization, and wrap part of it in {spin|spin} so each lead gets a slightly different version. Skip ALL CAPS, !!!, and "free / act now / limited time" - they all push your spam score up.
Left side - standard rich-text controls, applied to your selection or to whatever you type next:
B / I / U / S - bold, italic, underline, strikethrough.
Alignment - left, center, right, justify.
Bulleted list / Numbered list.
Link - select text, click the link icon, paste the URL.
Image - inline image insertion.
Emoji picker.
Undo / Redo.
Right side - the buttons specific to MailBeast:
{Spintax} - wraps the cursor (or selection) in a {|} block. Add |-separated alternatives inside ({Hi|Hello|Hey}) and MailBeast picks one per recipient at send time. Highlighted in colour in the editor so spin blocks stand out. Full guide: Spintax: Creating Email Variations.
{{Var}} - opens the variable picker. Click to insert {{first_name}}, {{company_name}}, custom CSV columns, etc., at the cursor. You can also just type {{ in the body and the same picker pops up inline. Full guide: Using Variables.
<> - HTML mode. See below.
The <> button flips the editor between rich-text mode (what you normally use) and HTML mode (raw markup you edit directly). The toggle preserves your content - the same email shows as a WYSIWYG view in rich-text mode and as <p>...</p> source in HTML mode.
Use HTML mode when you need to:
Wrap an image in a link - the standard pattern for personalized-video thumbnails (<a href="{{custom_video_link}}"><img src="{{custom_video_thumbnail}}" alt="..."></a>). The rich-text toolbar can't produce a clickable image; HTML mode can. See Using Variables → Personalized video pattern.
Tweak inline styling the toolbar doesn't expose - a specific colour, a non-default link style, a <br> instead of a paragraph break.
Paste in an existing HTML email from a designer or another tool, then keep editing it.
Debug a rendering issue - if the rich-text view looks wrong, switching to HTML mode shows you the actual markup the editor produced.
Don't use HTML mode for:
Multi-column layouts, big styled headers, heavy CSS - they look great in marketing newsletters but trigger spam filters in cold outreach. Cold email wants to look like a human typed it in Gmail.
Pasted boilerplate from a marketing template - it almost always carries inline CSS / table layouts / tracking pixels that hurt deliverability.
When in doubt, stay in rich-text mode. Reach for HTML mode for one specific thing (usually the linked-image pattern), then switch back.
The strip below the editor renders the email the way it appears in a recipient's inbox list view - sender name, subject (with variables resolved), date, and the snippet they see before opening. It updates live as you type.
Use it to spot blank subjects, awkward first lines, or a snippet that gives nothing away before opening.
The Preview button on the top-right of the editor opens a Gmail-style detail view of the full email - sender, threading, body, the works.
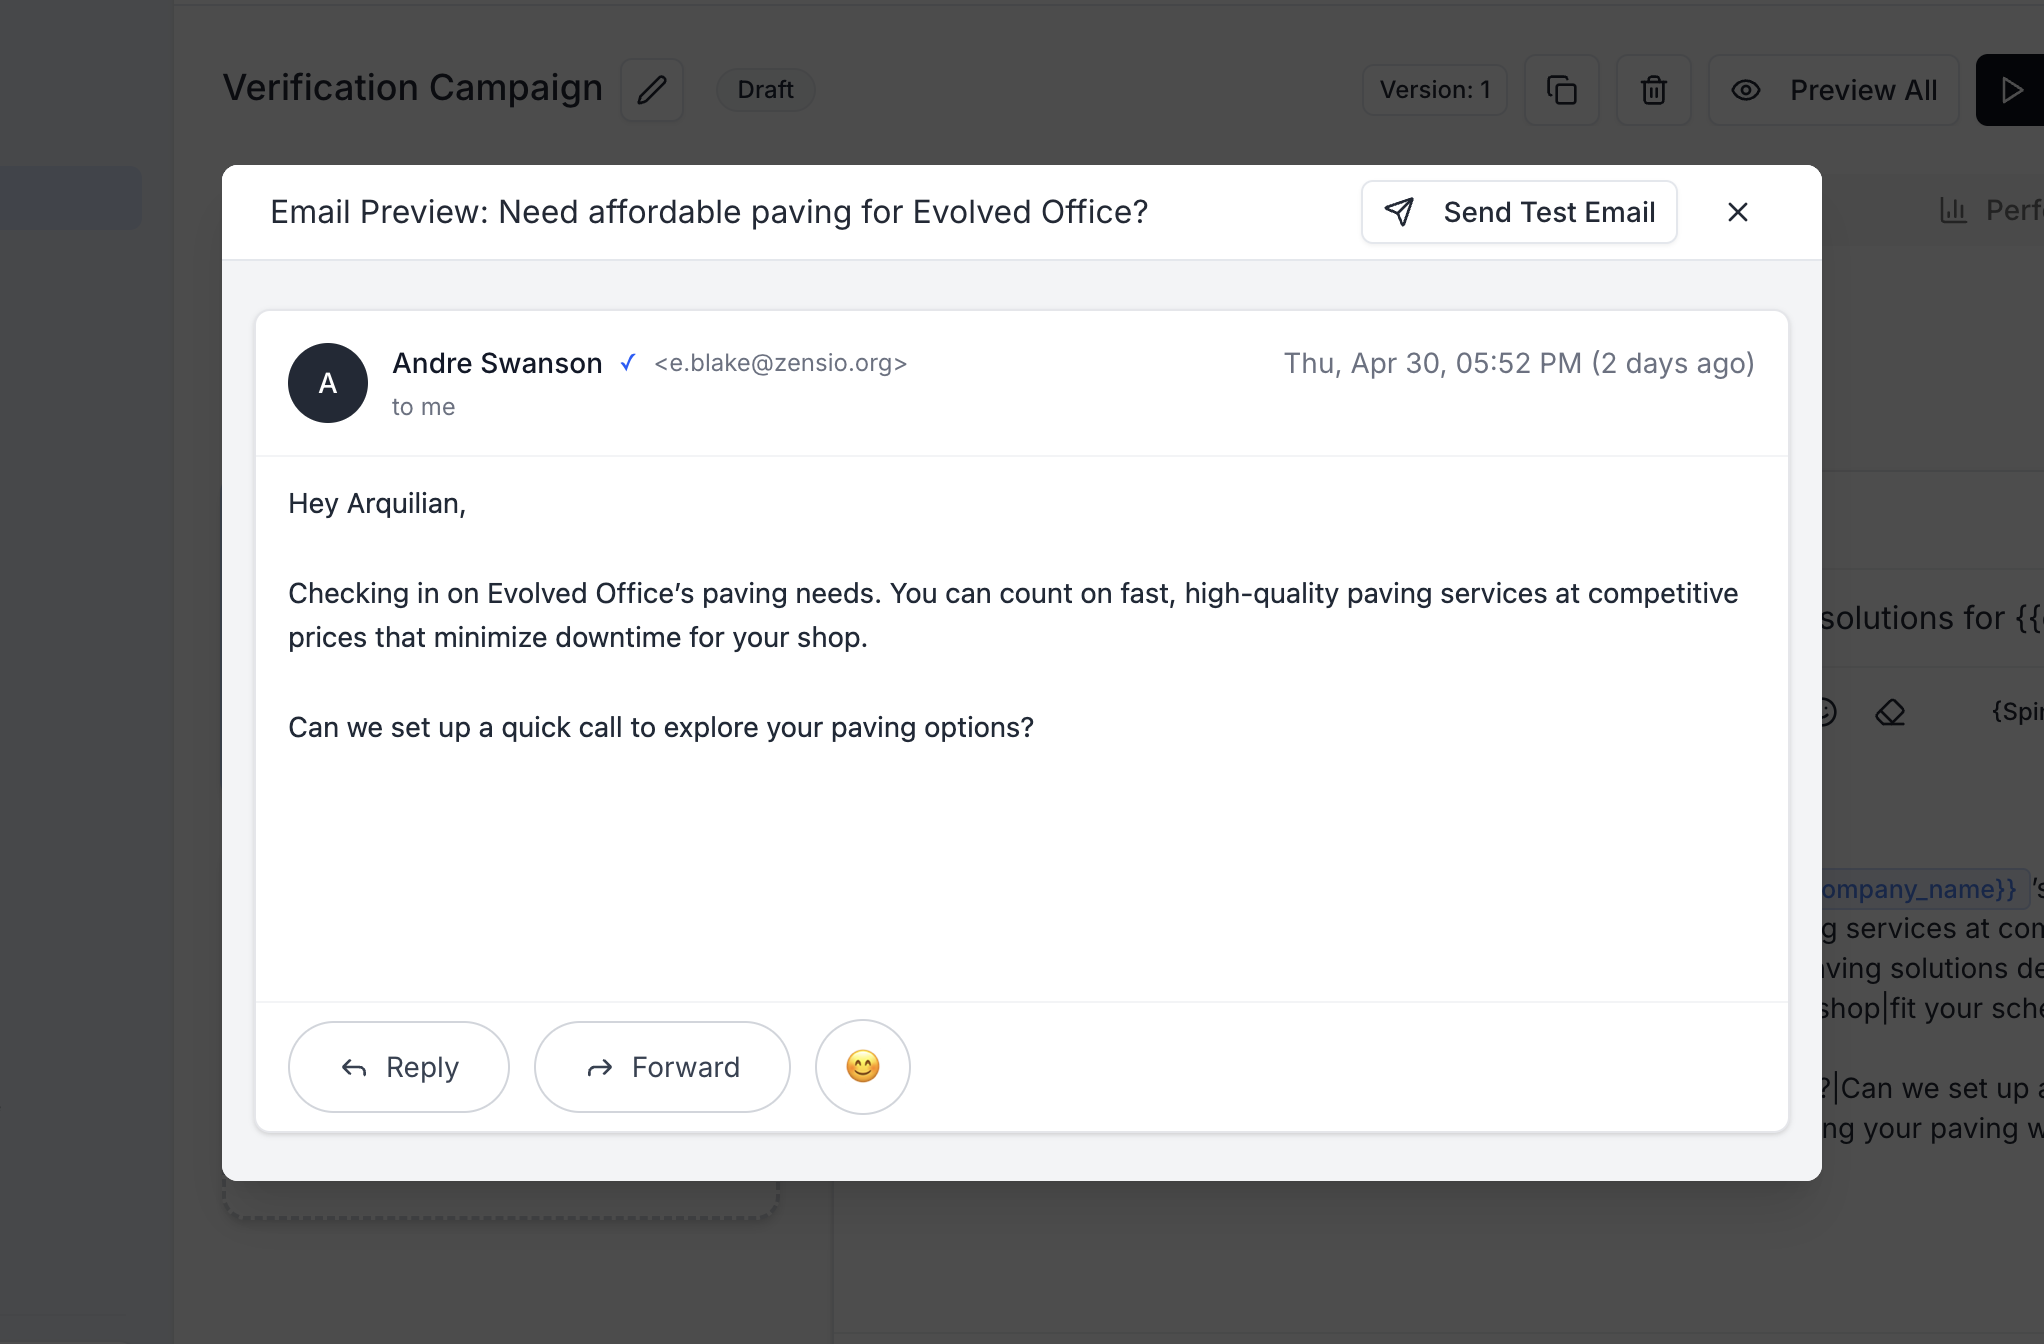
Variables are resolved against the lead you preview, and one spintax variation is picked, so you see what an actual recipient gets - not a template with {{...}} markers.
The same dialog has Send Test Email for delivering this exact rendered version to an inbox you control. See Sending Test Emails for the full flow.
Keyboard shortcut: ⌘+Enter on Mac, Ctrl+Enter on Windows/Linux.
Bottom-right of the body. Shows the live word count, and switches to a min-max range when the body contains spintax (e.g. 68-94 words) - the shortest and longest possible variations across every combination. Use it to confirm every version stays in the 50-125-word sweet spot for cold email.
Two buttons in the editor produce AI-generated content. Both are documented in detail in The Sequence Editor → AI assistance:
Compose with AI under the body - generates a single spintaxed template for the current step.
AI Mode toggle in the page header - generates a different email per lead at send time.
The editor has no plain-text/HTML toggle per step. To send the entire campaign as plain text - which often performs better for cold outreach because it sidesteps HTML-related spam triggers - flip Send as Text Only in Settings → Optimization. It's a campaign-level switch and it overrides whatever formatting you used in the editor.
50-100 words. Shorter wins.
One ask per email. Reply, click, call - pick one.
No images in Step 1. They bloat size and many clients block them by default.
Use spintax. Single biggest non-DNS deliverability lever.